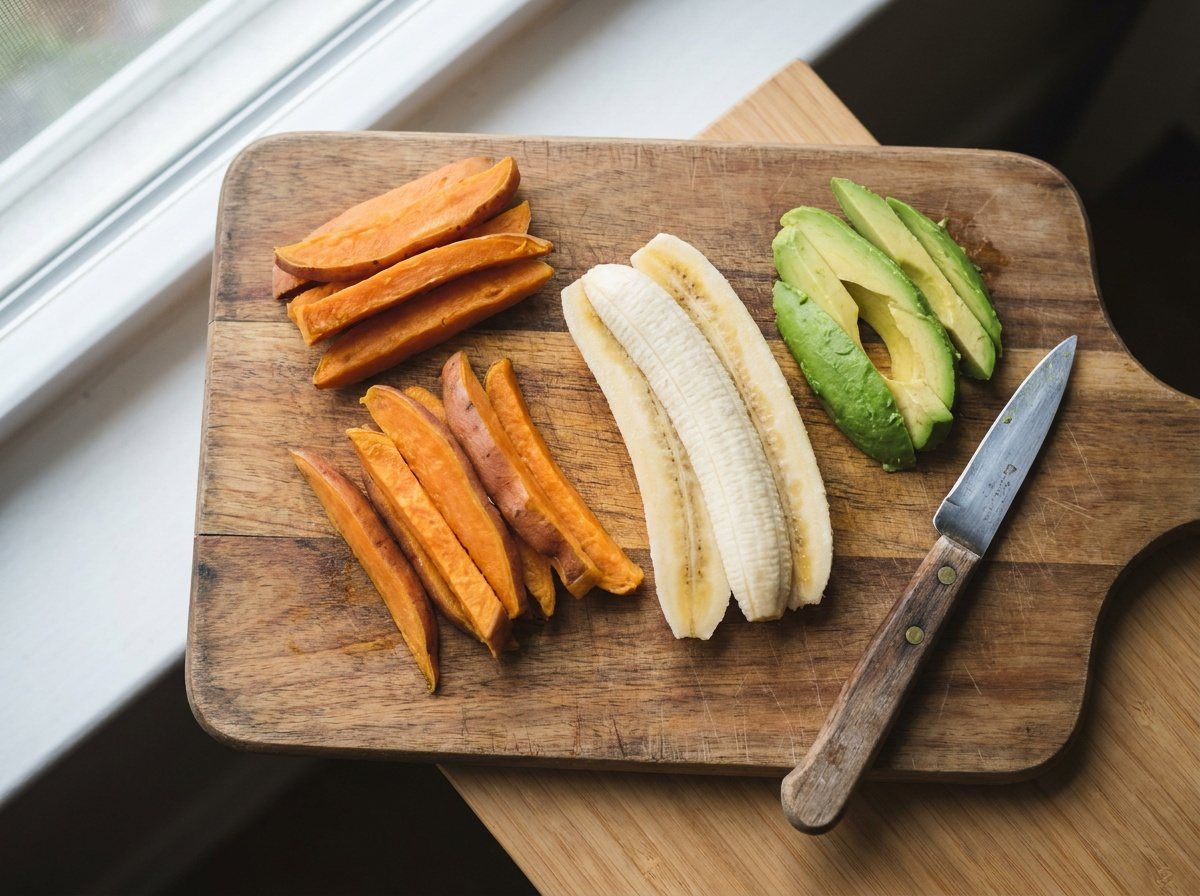
Once your baby starts reaching for food off your plate, a new question replaces the old ones: not just what to feed them, but how to cut it. Knowing how to cut food for your baby safely turns out to matter more than the specific menu, because the exact same piece of banana, chicken, or cheese can be perfectly safe or genuinely risky depending only on its size and shape. If you've already read our guide to choking hazards for babies, you know which shapes and textures carry the most risk. Consider this guide the hands-on companion: the actual knife-and-cutting-board version, with concrete sizes for every stage from first bites to the toddler table.
The good news is that the rules are short, and they repeat across almost every food, so you're not memorizing a different technique for every item on the grocery list. Below, you'll find the three size-and-shape rules that carry you from six months through the toddler years, a category-by-category walkthrough for the foods parents ask about most, the handful of tools that actually make a difference, and a simple three-test check for the moment you're standing at the counter unsure about a food that isn't on any list.
Shape and size matter more than the specific food. A piece cut correctly for your baby's age and grasp is safe, and the same food cut the wrong way is not, no matter how healthy it is. Once you know the three rules, cutting becomes an automatic habit within a few weeks.
Why Shape Matters More Than the Food Itself
Most choking risk in babies comes down to a short list of shapes and textures, not specific ingredients. Round, hard, sticky, and tough foods are the highest-risk categories at any age, because they either fit the width of a small airway, resist being squashed by gums, or are difficult to move safely to the back of the mouth, the same reasoning covered in more depth in the choking hazards guide linked above. What this guide adds is the practical side: exactly how to cut, cook, shred, or mash the foods already in your kitchen so they fall outside those risky categories, whether you're doing baby-led weaning, offering purees alongside finger foods, or some mix of both.
Two babies the same age can be at different points with chewing and hand skills, so treat every rule below as a starting range rather than a strict deadline. If your baby is a slightly later starter, begin with the earlier stage's sizes and move up once you see the skills described below. When in doubt, it's always safer to cut a food smaller and softer than the age guide suggests and adjust upward from there, rather than the other way around.
The Three Cutting Rules by Age
There are really only three shapes to know, one for each broad stage. Each is built around what your baby can actually do with their hands and mouth at that point, not an arbitrary size on a chart. Learn these three, and you can improvise confidently with almost any food that ends up in your kitchen.
6 to 9 Months: The Adult-Finger Rule
At this stage, your baby grabs with a whole-hand, fist-like grip, closing their fingers around an object rather than picking it up with fingertips. The right shape is a strip about the length and width of an adult finger, long enough that a good portion sticks out past a closed fist on both ends. That extra length matters twice over: it gives your baby something to hold without their fist covering the entire piece, and it means any bit gnawed off the exposed end is naturally a small, manageable amount. Texture matters just as much as size here. The strip should be soft enough to squash easily between your thumb and finger, about as much pressure as it takes to mash a ripe banana. Think soft-cooked sweet potato spears, ripe avocado wedges, well-cooked carrot batons, or thin strips of soft, slow-cooked meat. If a strip holds its shape when you press it, it needs to cook longer, get swapped for a naturally softer food, or wait a little before it goes on the tray, in line with the shapes covered in our baby finger foods guide.
9 to 12 Months: Pea-Sized Pieces for the Pincer Grasp
Somewhere in this window, most babies develop the pincer grasp, the ability to pick up a small piece between thumb and forefinger instead of scooping with a whole fist. Once you spot it, even in an early, clumsy form, you can start offering smaller pieces, roughly the size of a pea. This is less about your baby being ready for harder textures and more about their hands being ready for smaller ones. The food itself should still pass the same squash test as before: soft enough to flatten with light pressure, since molars still haven't arrived for most babies at this age. Good options include small pieces of shredded or minced meat, soft-cooked pasta shapes, small cubes of very soft cheese, flaked fish, or well-cooked vegetable pieces. Round foods still need quartering at this size, not simply cut down into smaller round pieces, since a small sphere is still a sphere.
The Toddler Years: Bigger Pieces, Same Shape Rules
Once your child moves into the toddler years, portions can gradually grow closer to adult-sized bites, and independence at the table usually takes off. It's tempting to assume the cutting rules relax along with the portion sizes, but the underlying shape rules don't disappear just because the pieces are bigger. Molars keep arriving well into the third year for most toddlers, rotary chewing (the side-to-side grinding motion) is still developing, and a distracted, laughing, or moving toddler is still at real risk from a round grape or a thick coin of hot dog. Round fruits and vegetables still need quartering. Hard raw pieces still need cooking or grating. Sticky spoonfuls still need thinning and spreading. Tough cuts of meat still need shredding or fine slicing. What does change is the overall size of a serving, and how much independence your toddler has cutting or biting pieces themselves with your guidance, rather than every piece pre-cut for them. The shapes that were non-negotiable at nine months stay non-negotiable well past the first birthday.
6 to 9 Months
- ▸Adult-finger strips, sticking out past a closed fist
- ▸Squashable with light pressure between two fingers
9 to 12 Months
- ▸Pea-sized, soft pieces for the developing pincer grasp
- ▸Round foods quartered, not just cut smaller
Toddler Years
- ▸Bigger, closer to adult-sized pieces
- ▸Same shape rules: quarter, cook soft, or shred
How to Cut Food for Your Baby, Category by Category
Once you know the three age-based shapes, the next question is how to apply them to whatever's actually in your fridge. A handful of food categories cause most of the confusion at the cutting board, so here's exactly how to handle each one, with the reasoning behind the technique so you can apply the same logic to foods that aren't on this list.
Round Fruits and Vegetables
Grapes, cherry tomatoes, blueberries, and melon balls are all some version of the same shape problem: smooth, round, and close to the width of a small airway, which lets them slide backward with almost no resistance even when a baby bites down. The fix is the same for all of them. Quarter the piece lengthwise, and if the fruit is larger, like a whole grape, quarter each half again so you end up with irregular, non-round pieces rather than two neat round halves. A halved grape is still round in cross-section and still a real risk; a quartered one is not. For bigger round fruits like plums or apricots, cut into similarly irregular wedges rather than rounds, and always remove the pit first. Our grape food-library entry has more detail on serving sizes by age. This rule holds all the way through the toddler years: it's the shape, not the softness, that makes a round fruit risky, and even a ripe, soft grape still needs to be quartered.
Meat and Poultry
Meat is one of the best sources of iron in your baby's diet, but a large piece asks a baby to do two hard things at once: bite off a manageable amount with immature teeth, then grind it into something safe to swallow using gums and a still-developing tongue. The fix depends on the cut and your baby's stage. For younger babies, shred or finely mince cooked meat so there's no piece left that needs real grinding, and slow-cooking or braising until it falls apart with a fork does most of the work for you. For older babies managing more texture, cut meat into thin strips, always sliced against the grain, across those long muscle fibers rather than along them, which is what actually makes a bite easy to tear apart with gums instead of turning stringy. A soft, well-cooked meatball or patty made from ground meat is a reliable option at almost any stage, since the mincing is already done. Chicken breast in particular can turn tough and stringy if it's overcooked, so err on the side of a longer, gentler cook and a good shred rather than a quick sear and a knife. For more ideas by age, see our guide to meat for babies.
Cheese
A cube of cheese is a classic tough, firm hazard: it doesn't squash the way ripe fruit does, and a baby can bite off a chunk that's hard to break down further. The safer shapes are thin strips, about the width of a matchstick for younger babies, or small, loose crumbles for babies managing pincer-grasp pieces. Softer cheeses, like a mild cheddar, mozzarella, or a cheese made for young children, work better than very firm, aged, or hard cheeses, which tend to hold their shape under pressure instead of giving way. Cubes are the one shape worth avoiding at every age until your child is confidently chewing and well into the toddler years, since a cube is exactly the size and firmness that's hardest to manage. Our cheese food-library entry has more on soft, age-appropriate options. Grated cheese, stirred into a warm dish, is a safe, easy choice any time you're unsure.
Hard Raw Fruits and Vegetables
Raw carrot coins, apple chunks, and other firm, crunchy produce share the same problem: a baby's gums can't reliably break them down, but they're not obviously difficult enough to stop your baby from trying to bite off a piece anyway. There are two reliable fixes. The first is cooking: steam or boil the vegetable until it's soft enough to mash easily between two fingers, roughly the texture of a ripe banana, then cut it into the appropriate strip or pea-sized shape for your baby's stage. The second is grating: finely grated raw carrot or apple loses the hard, chunky texture that makes it risky while keeping the raw flavor, and works well stirred into a dish rather than served in a pile a baby might scoop up by the handful. Our carrot food-library page has age-by-age serving ideas using both methods. As a general habit, any raw fruit or vegetable that resists a light squash between your fingers needs either more cooking or a grater before it reaches your baby's tray.
Bread
Plain bread seems harmless, but fresh, soft bread can compress into a dense, gummy ball in a baby's mouth that's surprisingly hard to move around and swallow, especially in a big, doughy bite. Lightly toasting bread firms it up and dries it out just enough to stop that gumming-up effect, while keeping it soft enough to squash easily. Cut it into strips rather than cubes or small squares, since a strip is easier for your baby to hold, gnaw at the edge of, and control than a small chunk that can be pushed to the back of the mouth all at once. The same logic applies to pancakes, waffles, and soft rolls: a light toast and a strip shape beat a thick, doughy square every time. Spreads like nut butter should stay thin, following the same rule as any sticky food, rather than piled on in a thick layer.
Every Food, Prepped the Right Way for Your Baby's Age
Grubsy's food database shows the exact cutting and prep instructions for hundreds of foods, from grapes to steak, and automatically updates the guidance as your baby moves through each stage.
The Tools That Actually Help
You don't need a full kitchen renovation to cut food safely, but a few specific tools make the job noticeably easier and more consistent, especially in the tired, one-handed reality of feeding a baby three times a day.
A small kitchen toolkit that covers almost everything
- ▸A small, sharp paring knife: easier to control for thin strips than a large chef's knife, and a genuinely sharp blade is safer than a dull one that slips
- ▸Kitchen scissors: fast for soft foods like pasta, pancakes, soft meat, or berries, and handy for resizing a piece right at the table
- ▸A fork: press it into food to test squashability in seconds, or use the tines to mash or flake foods like banana or fish right on the tray
None of these need to be baby-specific or expensive. A basic paring knife, a dedicated pair of kitchen scissors kept within reach at mealtimes, and the fork already in your drawer cover almost everything you'll need. The scissors in particular become a habit fast, since snipping a too-big piece in half at the table takes seconds and solves the problem on the spot.
When in Doubt: The Three-Test Decision Flow
Every food guide runs out of specific examples eventually, and you will end up standing at the counter with something that isn't on any list. When that happens, three quick checks, done in order, cover almost every situation.
The three-test check
- ▸Squash test: press the food between your thumb and finger. If it flattens with light pressure, it's likely soft enough. If it holds its shape and resists, cook it longer, grate it, or wait
- ▸Size test: compare the piece to your baby's current stage size, an adult-finger strip, a pea-sized piece, or a toddler-appropriate bite, and cut down anything bigger
- ▸Shape test: check for round, tube, or coin shapes. Quarter anything round, and slice tubes into strips instead of rounds
Running through these three tests turns into background habit within a few weeks, something you do almost without thinking while you're also stirring dinner and answering a toddler's question. It's worth remembering, too, that an occasional gag while your baby learns to manage a new size or texture is a normal, protective reflex, not a sign you've gotten the cut wrong. Our guide to gagging versus choking walks through how to tell the two apart if you'd like more reassurance on that front. This guide reflects general, mainstream feeding guidance rather than advice for your specific child, so if your baby has a diagnosed swallowing difficulty, a medical condition, or you have an ongoing concern about a particular food, your pediatrician or a feeding specialist is the right person to ask.
Final Thoughts
Cutting food safely for your baby comes down to three shapes that scale with age (adult-finger strips, then pea-sized pieces, then gradually bigger toddler bites) applied through a short list of category techniques: quarter anything round, cook or grate anything hard, thin anything sticky, and shred or slice anything tough against the grain.
It feels slow and deliberate for the first few weeks, and then, almost without noticing, it becomes the same automatic habit as checking a car seat buckle: something you do every time without thinking it through from scratch. Trust the three tests, keep watching your baby rather than the clock, and the cutting board stops being one more thing to worry about.